Post Your Needs

Travera Marble

About

Material Type:
Marble
Origin:
Pakistan (Balochistan)
Primary Color(s):
Beige
Recommended Usage:
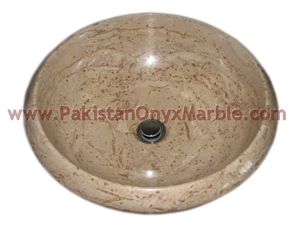
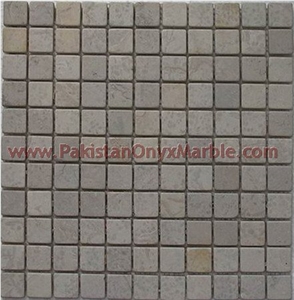
Kitchen and bathroom countertops, commercial tops, gravestones, bathroom countertops, building stone, ornamental stone, interior, exterior wall applications, wash basins, stairs, mosaic, waterjet pattern
Additional Names:
Beige Travera Marble, Tervera Marble, Travera Beige Marble, Travera Cream Marble, Tavera Marble, Travera Limestone, Travera Marble
Finished Surface:
Polished,Bush Hammered,Tumbled,Brushed,Honed,Split,Machine Cut,Natural Surface,Sandblasted,Acid Washing,Combed,Leathered,Water Jet,Filled,Chiseled,Pickling

Description

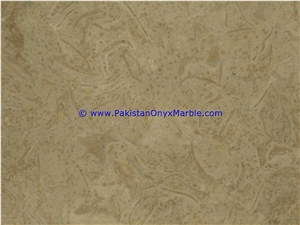
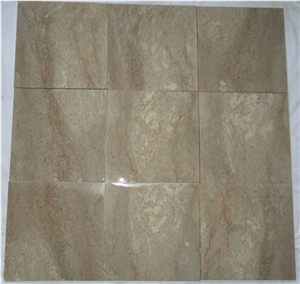
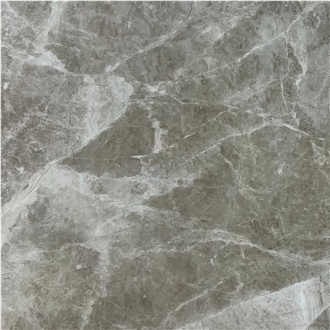
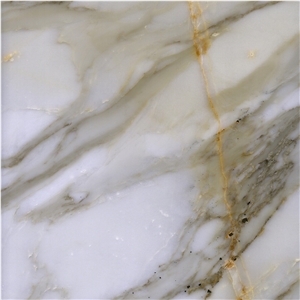
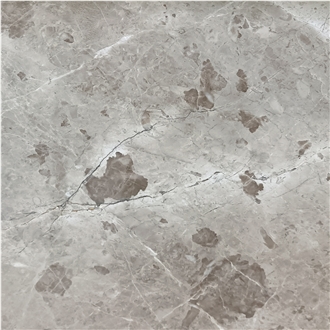
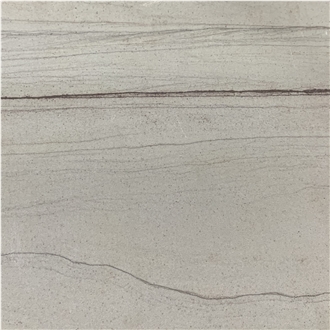
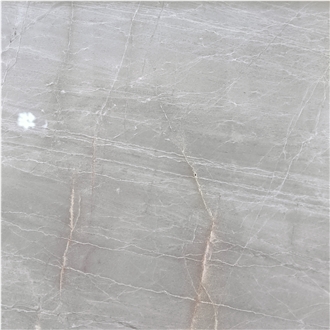
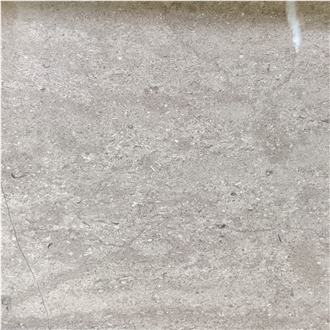
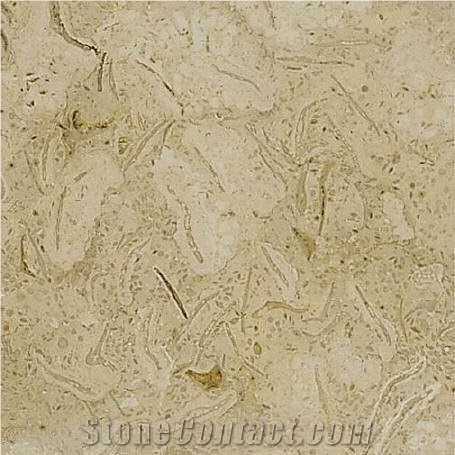
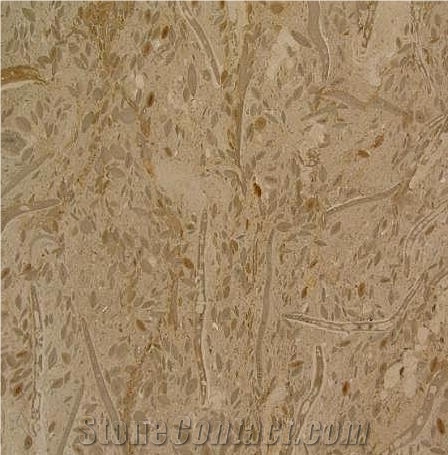
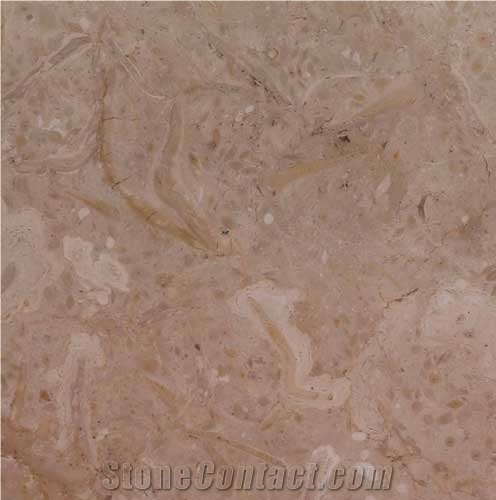
Travera Marble, also known as Travera Beige Marble, is a unique and distinctive natural stone quarried in Pakistan. It is highly regarded for its fossilized appearance and beautiful beige coloration, making it a popular choice for various interior and exterior design applications.

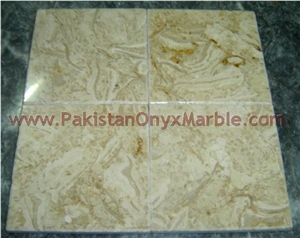
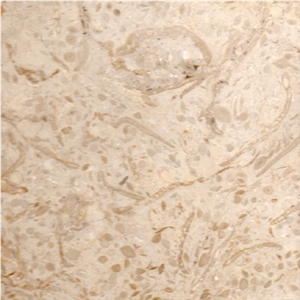
The defining characteristic of Travera Marble is its fossilized patterns and textures. It showcases the remnants of ancient marine life, such as shells, coral, and other organic materials that have been preserved within the stone over millions of years. These fossils create a captivating and visually intriguing appearance, adding a sense of history and natural beauty to the marble.

The predominant color of Travera Marble is a warm and inviting beige. It exhibits variations in shades, ranging from light cream to deeper beige tones, adding depth and character to the stone. The beige color palette makes it a versatile choice that can complement a variety of design styles and color schemes.

Travera Marble typically features a polished or honed finish, enhancing its natural beauty and bringing out the details of the fossils embedded within the stone. The polished surface creates a smooth and reflective appearance, while the honed finish offers a more matte and textured look, depending on the desired aesthetic.

Due to its captivating appearance and durability, Travera Marble is commonly used for flooring, countertops, wall cladding, and other decorative elements. Its fossilized patterns make it particularly popular for creating unique and visually striking feature walls or focal points in interior spaces.

To maintain the beauty of Travera Marble, regular cleaning with a mild soap and water solution is recommended. It's important to avoid harsh or abrasive cleaners that could damage the surface. Applying a sealant can help protect the marble from staining and preserve its natural appearance over time.

In summary, Travera Marble is a fossilized beige marble quarried in Pakistan. Its unique fossilized patterns, warm beige color, and durability make it a favored choice for various interior and exterior design applications. Whether used in residential or commercial projects, Travera Marble adds a touch of natural beauty and history to any space.

FAQ

How can I drill Travera Marble tiles without cracking?

Drilling Travertine marble tiles requires careful and precise techniques to avoid cracking. Heres a step-by-step guide to help you drill Travertine marble tiles without causing any damage: 1. Choose the right drill bit: Use a diamond-tipped or carbide-tipped drill bit specifically designed for drilling through hard materials like marble. These bits will reduce the risk of cracking. 2. Mark the drilling spot: Measure and mark the exact spot where you want to drill. Use a pencil or masking tape to make the mark. This will help guide your drill and ensure precision. 3. Secure the tile: Place the marble tile on a stable surface, such as a workbench or sawhorses. Use clamps or a vacuum base to firmly hold the tile in place. This will prevent it from moving or vibrating during the drilling process. 4. Prepare for drilling: Fill a squirt bottle or a spray bottle with water. This will be used to keep the drill bit and the marble cool during the drilling process. Marble can heat up quickly, leading to cracks and damages, so keeping it cool is crucial. 5. Start drilling: Begin drilling at a slow speed with light pressure. Apply enough pressure to make contact with the tile but avoid pushing too hard. Let the weight of the drill do most of the work. Drilling at a low speed and with a light touch will help prevent cracks. 6. Maintain cooling: While drilling, intermittently spray water onto the drill bit and the drilling area. This will help keep the temperature down and prevent overheating, which could lead to cracking. 7. Take breaks: Occasionally pause the drilling process to allow the bit and the tile to cool down. This practice will help avoid excessive heat buildup and reduce the risk of cracking. 8. Drill gradually: Begin with a smaller bit size and gradually increase to the desired size. This step-by-step approach will help prevent chipping and cracking. 9. Clean the debris: After drilling, remove any debris from the drilled hole. This will ensure that the hole is clear and ready for any further installation, such as anchors or screws. 10. Remove any rough edges: Use sandpaper to smooth any rough edges left from the drilling process. This will give a clean and finished look to the hole. Remember, patience, low drilling speed, and frequent cooling are key to successfully drilling Travertine marble tiles without cracking them.
Read question details

How can I cut Travera Marble tiles without cracking?

To cut Travera Marble tiles without cracking, follow these steps: 1. Choose the right tools: Use a wet saw with a diamond blade specifically designed for cutting marble. The wet saw helps to keep the blade and the tile cool, preventing heat-related cracks. 2. Mark your cut: Measure and mark the desired cutting line on the surface of the marble tile using a pencil or a marker. Double-check your measurements before making the cut. 3. Set up the wet saw: Fill the reservoir of the wet saw with water, ensuring it stays at the appropriate level during the cutting process. Adjust the cutting depth and angle of the blade as needed. 4. Secure the tile: Place the Travera Marble tile on the wet saws cutting table. Adjust the guides to hold the tile securely in place, ensuring it wont move during the cutting process. 5. Cut slowly and steadily: Start the wet saw and slowly push the tile into the blade following the marked cutting line. Apply even pressure but avoid pushing too hard. Let the blade do the work to prevent cracking. 6. Use continuous water flow: Keep the water flowing from the wet saw onto the cutting area throughout the process. This helps to keep the blade and the tile cool, reducing the risk of cracking. 7. Use light pressure at the end: When nearing the end of the cut, reduce the downward pressure on the tile slightly. This will help to prevent any sudden cracks as you complete the cut. 8. Support the cut: Once the cutting is complete, support the cut-off portion of the tile to prevent it from falling freely and potentially cracking. 9. Smooth the edges: After cutting, use sandpaper or a diamond polishing pad to smooth any rough or sharp edges on the cut marble tile. Remember to wear appropriate safety gear, such as safety glasses and gloves, when cutting marble tiles. Take your time and be patient during the cutting process to achieve clean, precise cuts without cracking the Travera Marble tiles.
Read question details

How can I cut Travera Marble mosaic tiles without cracking?

To cut Travera Marble mosaic tiles without cracking, it is important to follow these steps: 1. Prepare the workspace: Make sure you have a stable and clean surface to work on. Place a sturdy material, such as a wooden board or a rubber mat, underneath the tile to prevent it from moving during the cutting process. 2. Use a tile cutter or wet saw: A tile cutter or wet saw specifically designed for cutting tiles is recommended for marble. These tools provide precise cuts and help to prevent cracking. 3. Measure and mark the tile: Use a ruler or measuring tape to determine the required size of the tile piece. Make a clear, straight line across the surface of the tile using a pencil or marker. 4. Lubricate the cutting area: Marble is a delicate material and tends to chip or crack easily. Applying water or a lubricating solution to the cutting area helps to reduce friction and heat during the cutting process, minimizing the risk of cracking. 5. Score the tile: If using a tile cutter, place the tile face-up on the cutter and align the marked line with the cutting wheel. Apply even pressure on the tile and slowly run the cutting wheel along the marked line to score the surface. Repeat this process a few times until a visible groove is formed. 6. Snap or cut the tile: Once the tile is scored, you can either use the tile cutters snapping mechanism to break the tile along the scored line or switch to a nipper tool or pliers to carefully break the tile along the line. Ensure even pressure is applied during the snapping or cutting process to avoid cracking. 7. Smooth the edges: After cutting the tile, there might be rough or sharp edges. You can use a tile file, sandpaper, or a wet polishing pad to smooth out the edges and achieve a clean finish. Remember to always wear appropriate safety gear, such as safety glasses and gloves, when cutting tiles. Additionally, practice on spare or leftover tiles before cutting the actual mosaic tiles, as this will help you gain confidence and improve your cutting technique.
Read question details

How can I install a Travera Marble mosaic for a wall application?

Installing a Travera Marble mosaic for a wall application requires several steps. Here is a general guide to help you through the installation process: 1. Prepare the wall: Ensure that the wall is clean, flat, dry, and structurally sound. Remove any existing paint, wallpaper, or loose material. Repair any cracks or holes and sand down any uneven areas. 2. Measure and plan: Measure the wall area where you want to install the Travera Marble mosaic, and carefully plan the layout of the mosaic. Consider any patterns or designs you wish to create. Its advisable to use a measuring tape, level, and chalk line to mark guidelines on the wall for reference during installation. 3. Gather your materials: In addition to the Travera Marble mosaic tiles, you will need materials such as thinset adhesive, a trowel, spacers, a tile cutter or wet saw (if necessary for cutting tiles), a notched trowel, grout, a grout float, and a sponge. 4. Apply the adhesive: Follow the manufacturers instructions to mix the thinset adhesive. Using a notched trowel, apply an even layer of adhesive on a small section of the wall, following your marked guidelines. Make sure the adhesive is evenly distributed. 5. Install the mosaic tiles: Press the Travera Marble mosaic tiles into the adhesive, working from the bottom up. Use the spacers to ensure even gaps between the tiles. If needed, use a tile cutter or wet saw to cut tiles to fit at the edges or around obstacles. Continue applying adhesive and pressing tiles until the entire area is covered. 6. Allow the adhesive to dry: Refer to the manufacturers instructions for the recommended drying time of the adhesive. Avoid touching or disturbing the tiles during this time. 7. Apply grout: Once the adhesive has dried, remove the spacers and prepare the grout according to the manufacturers instructions. Using a grout float, apply the grout to the gaps between the mosaic tiles, pressing it firmly and ensuring complete coverage. Wipe off the excess grout from the surface of the tiles using a damp sponge. 8. Clean the tiles: After the grout has partially dried, use a clean, damp sponge to remove any remaining grout haze or residue from the tiles. Rinse the sponge frequently to avoid spreading grout. 9. Final touches: Once the grout is completely dry, use a soft cloth to polish the Travera Marble mosaic tiles, restoring their natural shine. Remember to always refer to the specific instructions provided by the manufacturer of the Travera Marble mosaic tiles and the adhesive/grout you are using, as the process may vary slightly depending on the products.
Read question details

How can I install Travera Marble mosaic flooring?

Installing Travera Marble mosaic flooring requires several steps and the right tools. Here is a general guide: 1. Prepare the subfloor: Ensure that the subfloor is clean, level, and free from any debris or imperfections. If needed, repair any cracks or uneven areas. 2. Acclimate the tiles: Unbox the tiles and allow them to acclimate to the rooms temperature for at least 48-72 hours. This is important to prevent expansion or contraction after installation. 3. Plan the layout: Measure the room and plan the layout of the mosaic tiles. Use a chalk line or a measuring tape to create reference lines for accurate installation. 4. Apply tile adhesive: Mix a thin-set or adhesive according to the manufacturers instructions. Use a trowel to evenly spread the adhesive on the floor, using the reference lines as a guide. 5. Install the tiles: Carefully press the marble mosaic tiles into the adhesive, starting from one corner and following the reference lines. Use a rubber mallet or a wooden block covered with a cloth to gently tap each tile into place. 6. Set the mosaic sheets: If your mosaic tiles come in sheets, apply the adhesive to the back of each sheet, press it into place, and use a float or a roller to ensure a firm bond. 7. Grout the tiles: After the adhesive dries (usually 24-48 hours), mix the grout according to the manufacturers instructions. Apply the grout over the mosaic tiles using a rubber float, ensuring that all the gaps between the tiles are filled. 8. Clean excess grout: Wait for the grout to partially dry and wipe away excess grout from the tile surface using a damp sponge. Be careful not to disturb the grout lines. 9. Seal the grout: Once the grout has fully cured (usually after a few days), apply a grout sealer according to the manufacturers instructions. This will protect the grout from stains and moisture. 10. Final cleaning: Give the floor a final cleaning with a mild detergent or stone cleaner. Avoid any harsh chemicals that can damage the marble. Remember to always refer to the specific instructions provided by the manufacturer of your Travera Marble mosaic tiles and adhesive, as the installation process may vary slightly.
Read question details

Can Travera Marble mosaic be used for a high-traffic area floor?

Yes, Travera Marble mosaic can be used for a high-traffic area floor. Marble is a durable natural stone that is known for its strength and longevity. However, it is important to properly seal and maintain the marble to ensure its durability in high-traffic areas. Regular cleaning and resealing will help protect the marble from scratches and stains. Additionally, using appropriate floor mats and furniture pads can further protect the marble surface.
Read question details

Do I need special adhesive for Travera Marble wall tiles?

Yes, it is recommended to use a specialized adhesive for Travertine marble wall tiles. Regular adhesives may not provide sufficient bonding strength and durability for this type of natural stone. It is best to consult with the manufacturer or supplier of the Travertine marble tiles to determine the specific adhesive that is recommended for installation.
Read question details

What is the best adhesive for Travera Marble mosaic?

The best adhesive for Travertine marble mosaic is a high-quality thin-set mortar specifically formulated for natural stone. This type of adhesive provides excellent bonding strength, flexibility, and durability, which are essential for securing delicate and relatively soft materials like marble mosaic. Additionally, ensure that the thin-set mortar is suitable for both interior and exterior applications, as Travertine marble can be used in various settings. Lastly, be sure to follow the manufacturers instructions and recommendations for proper mixing and application of the adhesive to achieve the best results.
Read question details

What grout to use for Travera Marble mosaic?

For a Travera Marble mosaic, it is recommended to use an unsanded grout. Unsanded grout is finer and will not scratch or damage the delicate surface of the marble tiles. It is particularly suitable for smaller grout lines, such as those typically found in mosaic tiles. Be sure to select a grout color that complements the marble mosaic to enhance its overall aesthetic appeal.
Read question details

How can I seal Travera Marble mosaic?

To seal Travertine Marble mosaic, follow these steps: 1. Preparation: Clean the surface of the mosaic thoroughly. Use a mild detergent or stone cleaner to remove any dirt, grime, or stains. Rinse the surface with clean water and allow it to dry completely before sealing. 2. Choosing the sealer: Select a high-quality sealer specifically designed for natural stone. Look for a penetrating sealer that is water-based and provides stain resistance without altering the appearance of the stone. 3. Test the sealer: Before applying the sealer to the entire mosaic, it is crucial to test it on a small and inconspicuous area. Apply a small amount of the sealer and let it sit for the recommended time. Wipe off the excess and observe the results to ensure it does not alter the color or finish of the stone in an undesirable way. 4. Application: Apply the sealer evenly and generously using a clean, lint-free cloth or a soft-bristle brush. Make sure the entire surface of the mosaic is covered. Allow the sealer to penetrate the stone for the recommended time as per the manufacturers instructions. 5. Wipe off the excess: Once the sealer has soaked in, wipe off any excess sealer from the mosaic using a clean cloth. Be thorough in removing any pooling or residue to prevent streaks or blotches. 6. Curing time: Allow the sealer to dry and cure for the recommended period. This can vary based on the sealer brand and type. 7. Additional coats: Depending on the sealer and the porosity of the stone, you may need to apply multiple coats. Allow each coat to dry completely before applying the next one. Follow the manufacturers instructions for the number of coats recommended. 8. Maintenance: Regularly clean the sealed mosaic with a pH-neutral cleaner and avoid using acidic or abrasive cleaning products that can damage the sealer. Reapply the sealer periodically, typically every 1-3 years, or as per the manufacturers recommendation. Remember, specific instructions may vary depending on the sealer brand, so always read and follow the manufacturers guidelines carefully for the best results.
Read question details

Products & Prices

Hot Marble

New Marble

Post Your Request

The request includes:
  1. surface finished, size
  2. quantity required